
- 每天进步一点点!
文章分类
常用手册
github不支持tlsv1.1后, 出现SSL connect error【转载】
今天遇到github的仓库克隆不下来,报错如下:
fatal: unable to access 'https://github.com/fisher-yu/golang.git/': SSL connect error
过完年回来, github不安分了, 发现博文说不支持TLSv1/TLSv1.1: Weak cryptographic standards removed, 没看到这篇博文之前, 还以为是代理问题, 设置过, 还是不行, 还更新到最新的git, 还是不行, 就查了一下TLS协议, 终于通过git的文档中获得提示: git配置文档.
首先, 更新git, 我也没查过要更新到什么版本, 反正之前用1.8有问题, 接下来的操作都不起效, 换了2.16以后才可以, 有条件就更到最新呗. 至于怎么更新, 自己查资料, 我就不喜欢惯着你们. PS:OpenSSL和libcurl可能也要升级
然后就开始设置了, 就一行命令
git config --global http.sslversion tlsv1
理论上来说, 应该是不支持TLSv1的, 但设置成tlsv1才行, 其他的tlsv1.2什么的都不行, 我也不知道啊, 求指教, 求科普
因为是刚找到的方法, 也许其他大神还没有发现这问题, 如果有更好的办法, 请不吝指教.
创建自己的vagrant box【原创】
这里用的工具是vagrant 1.8.7,VirtualBox 5.0.40, CentOS 7.4 (Minimal)
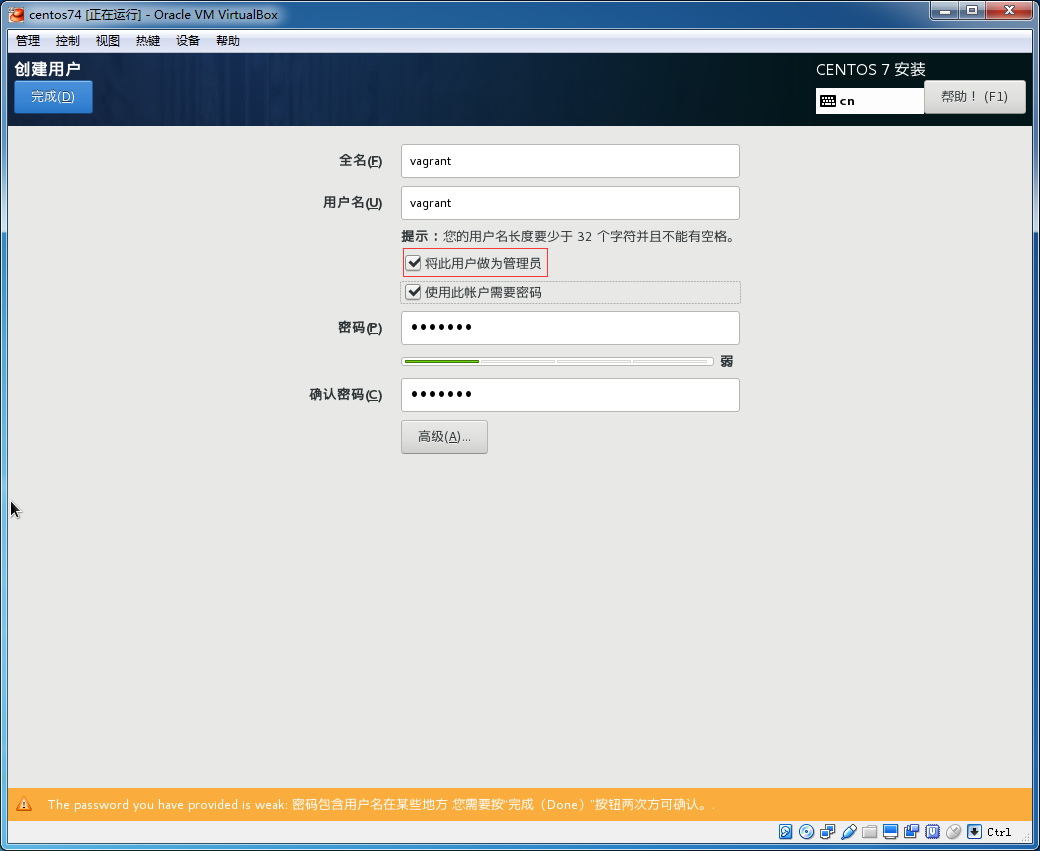
- 安装CentOS,安装比较简单,但是需要注意几个地方
1.root的密码需要设置为vagrant
2.创建用户vagrant时将vagrant设置成为管理员,这样就可以将vagrant加入到wheel组中了,vagrant的密码也是vagrant
- 设置开机启动网络
vi /etc/sysconfig/network-scripts/ifcfg-e[Tab]
将ONBOOT=no改为ONBOOT=yes
- 关防火墙firewall
systemctl stop firewalld.service #停止firewall
firewall-cmd --state #查看默认防火墙状态(关闭后显示not running,开启后显示running)
systemctl disable firewalld.service #禁止firewall开机启动
- 关闭虚拟机,为centos再添加一块儿使用桥接方式的网卡,这是因为virtualbox的NAT方式下,win7不能通过ssh连接到虚拟机的centos。

- 解决ifconfig无效的问题,安装net-tools
yum -y install net-tools
安装完后可以用ifconfig查看桥接网卡的ip地址,选一个自己喜欢的ssh客户端软件(如putty)连接到虚拟机。
nginx 手机端访问跳转到m站点【原创】
nginx 手机端访问跳转到m站点
     location / {
            if ($http_user_agent ~* (mobile|nokia|iphone|ipad|android|samsung|htc|blackberry)) {
                rewrite ^/(.*)$ http://m.1weidu.com/$1 permanent;    #进行正常访问的时候判断user_agent为手机,则重写至此页面
            }
         try_files $uri /index.php?$args;
     }
nginx远程PHP开发环境设置【原创】
server {
    listen       80;
    server_name  ~^(?<subdomain>.+)\.dev.domain.com;

    root /data/dev/$subdomain/project;
    index index.php;
    charset utf-8;

    access_log  /var/log/nginx/domain.com-access.log;
    error_log  /var/log/nginx/domain.com-error.log;

    location ~ .*\.(ico|gif|jpg|jpeg|png|bmp|swf)$ {
        expires 30d;
    }

    location ~ .*\.(js|css)$ {
        expires 10d;
    }

    location / {
        try_files $uri /index.php?$args;
    }

    location ~ \.php$ {
        fastcgi_index  index.php;
        fastcgi_pass   127.0.0.1:9000;
        fastcgi_param SCRIPT_FILENAME $document_root$fastcgi_script_name;
        include fastcgi_params;
    }
}
这样在/data/dev/下新建开发者的目录,可以以开发者名字的全拼或简写命名,如:abc,然后在这个目录acb下开发对应的项目project,项目的访问地址为:abc.dev.domain.com。可以做域名解析或绑定host访问。
centos下nginx、php-fpm、mysql、redis启动脚本【原创】
- nginx启动、重启、停止脚本
#!/bin/bash
#
# Startup script for Nginx - this script starts and stops the nginx daemon
#
# chkconfig:   - 85 15
# description:  Nginx is an HTTP(S) server, HTTP(S) reverse proxy and IMAP/POP3 proxy server
# processname: nginx
# config:      /usr/local/nginx/conf/nginx.conf
# pidfile:     /usr/local/nginx/logs/nginx.pid

# Source function library.
. /etc/rc.d/init.d/functions

# Source networking configuration.
. /etc/sysconfig/network

# Check that networking is up.
[ "$NETWORKING" = "no" ] && exit 0

nginx="/usr/local/nginx/sbin/nginx"
prog=$(basename $nginx)

NGINX_CONF_FILE="/usr/local/nginx/conf/nginx.conf"

[ -f /etc/sysconfig/nginx ] && . /etc/sysconfig/nginx

lockfile=/var/lock/subsys/nginx

start() {
    [ -x $nginx ] || exit 5
    [ -f $NGINX_CONF_FILE ] || exit 6
    echo -n $"Starting $prog: "
    daemon $nginx -c $NGINX_CONF_FILE
    retval=$?
    echo
    [ $retval -eq 0 ] && touch $lockfile
    return $retval
}

stop() {
    echo -n $"Stopping $prog: "
    killproc $prog -QUIT
    retval=$?
    echo
    [ $retval -eq 0 ] && rm -f $lockfile
    return $retval
}

restart() {
    configtest || return $?
    stop
    sleep 1
    start
}

reload() {
    configtest || return $?
    echo -n $"Reloading $prog: "
    killproc $nginx -HUP
    RETVAL=$?
    echo
}

force_reload() {
    restart
}

configtest() {
  $nginx -t -c $NGINX_CONF_FILE
}

rh_status() {
    status $prog
}

rh_status_q() {
    rh_status >/dev/null 2>&1
}

case "$1" in
    start)
        rh_status_q && exit 0
        $1
        ;;
    stop)
        rh_status_q || exit 0
        $1
        ;;
    restart|configtest)
        $1
        ;;
    reload)
        rh_status_q || exit 7
        $1
        ;;
    force-reload)
        force_reload
        ;;
    status)
        rh_status
        ;;
    condrestart|try-restart)
        rh_status_q || exit 0
            ;;
    *)
        echo $"Usage: $0 {start|stop|status|restart|condrestart|try-restart|reload|force-reload|configtest}"
        exit 2
esac